
 First, pipe vertical lines on to the white iced surface of the cake (above)
 Next, draw 'invisible' horizontal lines with a knife over the piped red lines (as above) to create a 'feathered' effect
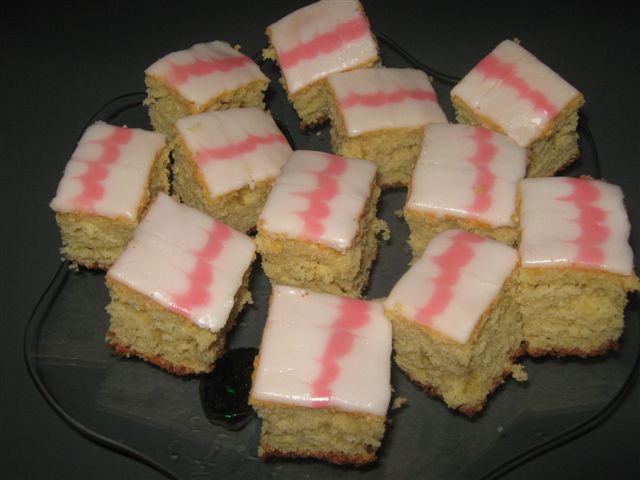 Once the icing has set, cut the cake in to squares ... and enjoy !
 Nothing beats a simple Vanilla Sponge and instead of making my usual round, plain iced cake I decided to make a square cake the other day for a change, and ice it with ‘feather icing’ which is an icing style I learnt from one of my childhood cook books when I was around 7 years old, growing up in then Rhodesia.
I remember my Mum baking the cake (with my sister and I ‘helping’) and her giving us the job of mixing the icing with her supervision. As the oldest child, I was allowed to actually do the ‘feathering’ and I remember always being quite proud of the end result !
Anyway, it’s been years since I’d tried this feather icing and it did not turn out as ‘feathery’ as it should – in hindsight, the pink icing mix should have been a bit runnier – but I decided to post the photo’s and the method anyway, as I like sharing even my ‘not-so-perfect’ kitchen adventures with you too as at the end of the day, that’s what cooking and baking is really all about, isn’t it ?
Vanilla Sponge
100 gm Margarine
¾ cup Sugar
3 Eggs, beaten
1 ½ cups Flour
2 tsp Baking Powder
¾ cup Milk
1 tsp Vanilla Extract
Cream the margarine & sugar together until light and fluffy. Add the eggs and beat well. Sift the flour and baking powder into the mixture. Add the milk & Vanilla extract and beat.
Pour into a greased square cake tin (approximately 21 cm x 24 cm/8 inch x 9.5 inch) and bake at 180’C/350’F/Gas Mark 4 for 20 to 30 minutes until a skewer inserted in the center comes out clean.
Feather Icing (Frosting)
500 gm pkt Icing Sugar
4 - 6 tbsps Cold Water
Few drops of pink Food Colouring
Sift the icing sugar into a bowl and make a well in the centre. Pour a couple of tablespoons of the water into this. Mix together with a metal spoon, slowly adding more water as needed, to form a smooth, easily spreadable icing that is not too runny. Remove around 3 – 4 tablespoons of this mixture and place it in a separate bowl, adding the food colouring to this to make a pink icing (which should be slightly runnier than the white icing is).
Now spread the white icing over the cooled cake & place the pink icing into a piping bag (I simply use a clean plastic bag with one corner just cut off slightly). Pipe the pink icing in straight vertical lines across the surface of the white icing, about 2 cm (approx. 1 inch) apart. Then take a clean, sharp knife and gently draw ‘invisible’ lines across the surface of the icing horizontally at about 2 cm (approx. 1 inch) intervals – this will ‘feather’ the pink icing lines and create a pretty effect. Allow to set slightly before cutting the cake in to squares and serving.