Showing posts with label Baking - Hot Dessert Recipes. Show all posts

Tuesday, October 19, 2010

Mini Jam (or Syrup) Sponges

These mini sponge puddings take just 5 minutes to cook in the microwave, and are best served hot with custard (Jam pudding pictured above, & Syrup pudding pictured below)


Here is a quick & easy recipe for mini jam (or syrup) sponges, which are an ideal Winter dessert. These are cooked in the microwave, and can be thrown together at the last minute – taking just 5 minutes to cook, they are also ideal for last minute guests.

These are best served with hot custard, but you could also serve them with cream.


Mini Jam (or Syrup) Sponges


150 gm (5 oz) Butter
110 gm (4 oz) Sugar
3 Eggs
170 gm (6 oz) Flour
1 ½ tsp Baking Powder
2 tsp Lemon Zest
1 -2 tbsp Milk (optional)
6 teaspoons of Strawberry Jam (or Syrup)

Cream the butter and sugar together until light & fluffy. Add the eggs, beating well after each addition. Sift in the flour and baking powder, stir in the lemon zest. If the mixture seems a little thick, add a tablespoon or two of milk.

Lightly grease 6 glass ramekin dishes (the ones I use are +- 8cm in diameter) & place a teaspoon of strawberry jam (or syrup) into each one. Spread it around a little to coat the bottom of the dish. Now divide the batter between the 6 dishes. Cover each one with plastic wrap, pierce a couple of times with a fork & place in the microwave on medium power for around 5 minutes (adjust settings/time according to your microwave). Alternatively you can leave the cling film off & bake these in the oven at Gas Mark 5/190’C/375’F for around 20 minutes.

Wednesday, June 16, 2010

Hot Banana Sponge Pudding

An ideal cold weather pudding, this hot banana sponge is guaranteed to warm you up !


What with all the World Cup fever in the air, I thought that it was about time to sidetrack a little and post a recipe – and also because looking back, I see that the last recipe I posted on the blog was a few weeks ago.

I know that many readers are entering their warm Summer season at the moment – but here in Africa, Winter is rapidly approaching – hence the need for nice, hot puddings like this ‘Hot Banana Sponge’ … but I promise, you’ll enjoy it just as much in Summer, too !

I had an upset reader a while ago, who tried one of my recipes and burnt her efforts as she claimed that the cooking time I stated in the recipe was far too long. I do test ALL my recipes before posting them on the blog (and most recipes are ones I’ve been cooking/baking for years, or very regularly) and always post photo’s of them for you to see, too … but I do have to say that as all ovens vary, (I have even found things to cook at different times at different altitudes) please just use my cooking times as a guideline only, and adjust to suit your oven – remembering to check what you’re cooking at least once during the cooking process, just incase !

So, now on to the recipe. This is one I’ve adapted from a ‘base’ recipe over time and it’s great for using up ripe bananas. The sugar which you sprinkle over the layer of bananas before baking, caramelizes them slightly and makes them a little chewy – which adds a nice twist to the recipe. If you use skim/fat free milk to make this pudding, it is actually virtually fat free - great if you are watching your weight or cholesterol (I’m doing both – ha !)

This goes deliciously well with custard, although in the photo above I served it with (tinned) cream, as I was feeling too lazy to make custard at the time ;) -:


Hot Banana Sponge Pudding

1 cup Flour
2 tsp Baking Powder
3 tbsp Sugar
pinch of Salt
¾ cup Milk
1 Egg, beaten
1 tsp Vanilla Extract
4 medium sized Bananas, sliced in to rounds

Sift the flour, baking powder, sugar and salt together. Add the milk, beaten egg and vanilla extract and mix to blend well. Pour into an approx. 27 cm x 16 cm (approx. 11 inches x 6 inches) rectangular baking dish and place the sliced bananas on the top of the batter. Sprinkle the lemon juice and brown sugar over and bake at Gas mark 5/190’C/375’F for 25 minutes until done.

Serve hot with custard or cream.

Tuesday, May 11, 2010

Apple Batter Pudding

My Granny's old recipe book dates back to the 1930's and has all her recipes handwritten in to it. This recipe for 'Apple Batter Pudding' is one of them.

The apple slices are sprinkled with a mixture of cinnamon & brown sugar .....

The batter is poured over the apple slices and topped with more cinnamon & brown sugar

The finished pudding, hot out of the oven. All it needs now is some custard !

The days are getting shorter – and cooler – as our African Winter season approaches. I just love Winter, it is my favourite season of the year (I know, for an African that’s quite weird – I’ll take cold, rainy, misty days over hot, sunshine-y days anytime !) Anyway, cold, shorter days cry out for hot, comfort food in my book … and a warm sponge pudding is no exception !

Here is one which I adapted from a handwritten recipe book which used to belong to my grandmother … it dates back to the 1930’s and is very precious to me. I often find that recipes dating back to this period are quite bland (little sugar, no salt, no vanilla extract for flavouring etc) – is this because our palates have been ‘ruined’ over time with excessive seasonings, flavourings and colourings, I wonder ? I also find that the recipe quantities are quite small … like the recipe below which should serve 6 to 8 but by today’s standards it would serve 4 to 5 comfortably. This is no doubt due to the large portion sizes we’ve become accustomed to over the years – even dinner plates are getting larger !

I’ve added extra sugar to the batter recipe, as well as a cinnamon and brown sugar mix sprinkled over the apples and again over the top of the pudding before baking. If you need to convert this recipe into measurements which suit you, then you can do so by scrolling to the end of this page to the ‘Recipe Converter’.

I served this with hot custard (made with custard powder out of a tin *gasp* what would Granny say ?!) and it was a hit with the whole family -:


Apple Batter Pudding

2 tbsp Butter
3 tbsp Sugar
1 Egg
1 cup Flour
2 tsp Baking Powder
½ cup Milk
1 tin (+- 385 gm) of Apple slices, drained
Cinnamon
Brown Sugar for dusting

Cream the butter and sugar. Add the egg and beat well. Sift in the flour and baking powder and add the milk. Mix to form a smooth batter. Place the apples into an oven proof dish and sprinkle with cinnamon & brown sugar. Spoon the batter over the top of these. Sprinkle a little more cinnamon & brown sugar over the top of the batter before baking at 180’C/350’F/Gas Mark 4 for 30 to 40 minutes until done. Serve hot with custard or cream.

Wednesday, March 31, 2010

Caramel Apple Sponge Pudding

Mmmmm .... each sweet, moist mouthful of this Caramel Apple Sponge is a delight !

A close-up of this tasty pudding - would you like a bite ?!


This is one of my Mum’s recipes which has been passed around the family. It’s a moist, sweet sponge pudding and is just perfect for a cold Winter’s day – or night ! I mostly make this pudding with apples, but have also made it with (tinned) pears before and it is just as tasty.

Sponge puddings like this (especially when they’re served with custard) remind me of the puddings we used to eat at boarding school … which I really didn’t enjoy much at all (boarding school that is, not the puddings !) … so I can’t say I have fond memories flooding back to me when I eat this (as I do with most food I eat – ha !) – but it is a great pudding and just the thing for those of us on this side of the world who will soon be entering our cold Winter months …..

(To convert the recipe measurements to ones which suit you, you can scroll to the bottom of this page and click on the ‘Conversion Calculator’.)


Caramel Apple Sponge Pudding

Sponge:
50 gm Butter (or Margarine)
150 gm Castor Sugar (very fine sugar – as fine as salt)
2 Eggs, beaten
100 ml Milk
150 gm Self Raising Flour
Pinch of Salt
420 gm tin Pie Apples, drained

Caramel Sauce:
125 ml Cream
100 gm Brown Sugar
50 gm Butter (or Margarine)
5 ml Caramel Essence

Cream the butter (or margarine) and sugar together until creamy. Add the beaten eggs and milk to this, and then sift in the self raising flour and salt. Beat well. Pour into a lightly greased round ovenproof dish (approx 20 cm/8 inches in diameter). Now take the pie apples and press into the batter (I use the back of a spoon for this) – most of the pieces will be covered by the batter and some may only be partially covered, but this is fine. Bake (uncovered) at 180’C/350’F/Gas Mark 4 for 45 mins to an hour.

Place the cream, brown sugar and butter into a saucepan and melt over a low heat, stirring to blend. Bring to the boil, remove from the heat, stir in the caramel essence and then pour the mixture over the pudding as it comes out of the oven.

Serve with hot custard or whipped cream.

Sunday, March 22, 2009

Baked Lemon Delight

This Baked Lemon Delight should be served as soon as it comes out of the oven, as it does start to sink quite quickly !

I serve this with hot custard

Handed down to me by my mother, who had them handed down to her by her own mother and step mother, this recipe was found in a pile of old recipe clippings dating back to ?? who knows when.

It comes from a newspaper (Rhodesian or South African, I cannot tell) and was on an old, yellowed piece of paper only a few centimeters in size. But someone took the time to carefully cut it out and keep it, and now I’ve had the joy of being able to make it (who knows how many years later ?) and enjoy eating it !

So, here is the recipe for “Baked Lemon Delight” which, once baked, has a sweet lemony custard like base and a light, fluffy almost soufflĂ© like topping. Great served with hot custard on a cold winter’s night -:


Baked Lemon Delight

2 tbsp Butter
¾ cup Sugar
3 Eggs, separated (beat the yolks in one bowl, & beat the whites until stiff in another)
2 tbsp Flour
Juice of 1 Lemon & the grated rind
¾ cup Milk
Cream the butter & sugar together until smooth. Add the well beaten egg yolks, flour, lemon juice & rind. Beat well. Stir in the milk & finally fold in the stiffly beaten egg whites. Pour the mixture into a greased ovenproof dish. Stand it in a pan of warm water (coming about ½ to ¾ the way up the dish) & bake, uncovered at 190’C/375’F/Gas Mark 5 for 45 to 60 minutes until the top has risen & brown. Serve immediately, as it will start to sink on standing

Friday, January 23, 2009

Apple & Strawberry Pie

The pie filling in it's sweet & tangy sauce - before it has been baked

The completed pie, just before being baked

"Anyone Can Bake" - book dating back to 1929 & which used to belong to my Grandmother

I don’t often make Apple Pie as crumble is so much easier (you don’t have to make pastry, for a start !) but when I do make one, I take my time over it & make a decent pastry for it from scratch.

I inherited a cookbook from my Transkei born Grandmother called “Any One Can Bake” which was published in New York in 1929. The inscription inside – in her handwriting – is 1939, when she first acquired the book in Zambia (then Northern Rhodesia). The pages are old and yellow, the blue cloth binding a bit tattered but the recipes it contains are timeless, and all are accompanied by unique hand drawn and painted/coloured illustrations.

I have copied many of my favourite and often used recipes from the book into another recipe file, as I try to handle the book as little as possible as it is so old and fragile. The pastry recipe for my Apple & Strawberry pie comes from this book, although I have adapted it & made it into a sweet pastry for this recipe (the original recipe is for a savoury pastry).

The filling is my own invention – chunks of apples and fresh strawberries suspended in a gooey, syrupy sauce which has a sweet flavour with a slight lemon tang which I think works really well with these two kinds of fruit. If you eat the pie cold the following day, the sauce sort-of sets & is even more tasty !

Apple & Strawberry Pie (pastry recipe adapted from “Anyone Can Bake”, compiled by the Educational Department of “Standard Brands Incorporated” 1929)

Pie Filling :
1 ½ cups Water
4 tbsp brown Sugar
2 tbsp Cornflour (Cornstarch)
¾ to 1 tsp ground Cinnamon (to taste)
pinch of Salt
3 tbsp Lemon juice
1 x tin of Unsweetened Pie Apples
+- 1 cup of fresh Strawberries, chopped

Bring the water to the boil. In a small saucepan mix together the sugar, cornflour, cinnamon & salt with a tablespoon or two of cold water to form a smooth paste. Once the water is boiling, pour it into the saucepan containing the cornflour paste mixture, and bring to the boil on a low heat, stirring to prevent lumps from forming. Add the lemon juice, stir again & allow to gently simmer for around 10 minutes, stirring occasionally. Remove from heat and add the apples & strawberries, stirring to blend.

Pie Crust:
3 cups Flour
4 tbsp Caster Sugar (fine sugar)
1 tsp Baking Powder
½ tsp Salt
1 cup Margarine (or Butter)
½ cup boiling Water
1 Egg, beaten (for glazing the pie crust)

Sift the dry ingredients together. Rub the margarine in until well mixed but not too fine. Add enough boiling water to make a stiff paste. Divide the pastry into 2 & roll each piece out thinly on a floured surface, to fit the baking dish you are using (I use a 30 cm round pie dish).

To assemble the pie:
Place one piece of the thinly rolled pastry into the bottom of a lightly greased pie dish. Press it against the dish so that it fits well. Now pour the apple/strawberry mixture into this. If you find that there is too much liquid, remove a few tablespoons of it. Now place the second piece of thinly rolled pastry on top of the fruit filling. Press around the edges with your fingers to seal them. Using a sharo knife, make small slits in the top of the pastry (this allows steam & juices to escape during cooking) and brush with the beaten egg. Bake at 190’C/375’F/ Gas Mark 5 for approximately 30 minutes until done.

This pie is great served with hot custard or whipped cream.

Thursday, October 30, 2008

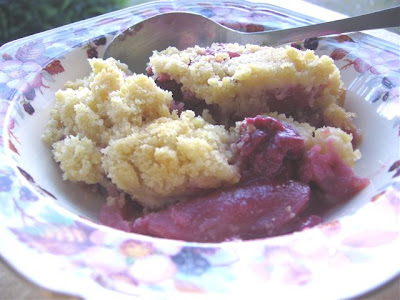
Apple & Blackberry Crumble

This Apple & Blackberry Crumble is delicious served with cream, or piping hot custard

I have been amazed recently to see blackberries appearing on our shelves here. This is because there is a large farm outside the city which grows raspberries, strawberries and now, obviously, blackberries for export and the excess/rejects end up on our local shelves.

Maybe those of you who live in countries where blackberries grow naturally and in abundance can tell me how they are actually supposed to taste because these ones are very, very bitter – almost tart – and completely inedible (in my opinion !) even with sugar sprinkled over them !

So, what do you do when life gives you bitter blackberries ? Why, you make blackberry and apple crumble, of course ! Which is exactly what I did last week.

Here is my recipe -: (you can see my recipe for “Peach & Cardamom Crumble” over here)


Apple & Blackberry Crumble

6 Apples – cored, sliced & gently boiled to soften
2 punnets of fresh Blackberries (around 500 gm’s)
50 ml brown Sugar*
190 ml Flour
125 ml brown Sugar
60 ml Milk Powder
70 gm Margarine

Place the boiled apple slices, fresh blackberries & 50 ml of brown sugar into a buttered pie dish, & mix together well.

In a separate bowl, blend the flour, remaining 125 ml of sugar, milk powder & margarine together to resemble fine bread crumbs. Sprinkle over the apple/blackberry mixture, pat down lightly and bake at 190 ’C/375 ’F/Gas Mark 5 for 30 minutes until golden brown.

This crumble is delicious served hot or cold with custard, cream or ice cream.

*You may need to adjust the quantity of sugar depending on the tartness of your blackberries.

Sunday, October 26, 2008

Barbecued Pineapple Wedges with a Rum Butter Glaze

I used light rum for this recipe (which we bought in Mauritius on honeymoon over 5 years ago !) although dark rum is called for ( It all tastes the same, anyway !)

This is a delicious recipe which I usually make for dessert when we have an abundance of pineapples and are having a barbecue. (There’s something lovely about eating cooked pineapple - especially when it is cooked out over the open coals !)

This recipe, although it doesn’t seem African in origin (due to the addition of the rum, perhaps ?) originates from the fantastic Tanzanian book “Safari Living Recipes” by Javed Jafferji & Gemma Pitcher, which showcases top camps and lodges around Tanzania and includes a few recipes from each establishment.

This recipe comes from Kusini Camp in the Serengeti National Park – a camp which was the ‘sister’ camp to the one we ran at the time (Swala Camp, Tarangire National Park) & well known to us as it was run at the time my 2 of our dearest friends. We spent many happy night’s in the camp (avoiding the resident buffalo !)


Barbecued Pineapple Wedges with a Rum Butter Glaze
(published in the book "Safari Living Recipes" by Javed Jafferji & Gemma Pitcher)

1 medium Pineapple
2 tbsp dark Sugar
1 tsp ground Ginger
4 tbsp melted Butter
2 tbs dark Rum

Cut pineapple lengthways into 4 wedges. Discard the centre core. Cut between the flesh and skin to release the flesh, but leave the skin in place. Slice the flesh across into chunks. Push a bamboo skewer lengthways through each wedge & into the stalk to hold the chunks in place. Mix together the sugar, ginger, melted butter and rum & brush over the pineapple wedges. Cook the wedges on a hot barbecue for 3 – 4 minutes, pour the remaining glaze over the top and serve.

Wednesday, September 10, 2008

Plum Sponge Pudding - Pure Comfort Food !

This Plum Sponge Pudding is great served with hot custard


When I was in the City the other day, I happened to see some tinned Kenyan plums in the little shop I buy all my dry goods from. These Kenyan plums are small, slightly sour and really delicious & as I went up to the counter to pay for them, I was already thinking (dreaming ?) of the perfect sponge pudding to put them in !

This is a recipe I’ve had – forever - it is a soft, sweet sponge which perfectly complimented the slight sourness of the plums. I served it hot with custard. (Although it was also enjoyed cold right out of the fridge later that night, too. Mmmmmm … now I wonder who THAT could have been ?!)


Plum Sponge Pudding

1 cup flour
½ cup Sugar
Pinch of Salt
2 tsp Baking Powder
½ cup Milk
1 Egg, beaten
2 tbsp Margarine (or butter), melted
1 x 400 gm tin of Plums, drained & pips removed

Sift the dry ingredients together and then add the milk, beaten egg and melted margarine. Mix well & pour into a round, lightly greased, oven proof dish. Push the plums in to the top of the batter (they will sink, which is fine) & bake at Gas Mark 6/200’C/400’F for around 30 minutes. Serve hot with custard.

Wednesday, August 27, 2008

Peach Pies - Inspired by Nancy !

These Peach Pies could just as easily be made with an apple, raisin and cinnamon filling - delicious !

There are so many inspiring bloggers out there, and Nancy over at “A Recipe A Day" is one of them.

I simply love Nancy’s easy cooking style and delicious ingredients which call for minimum ingredients and maximum flavour – she cooks the type of food I just love to cook (and eat !) & a few weeks ago I commented on one of the recipes she’d just posted for “Cherry Cream Cheese Turnover Cookies” (which you can see on her blog over here) which really appealed to me. Being as food obsessed as I am (especially when it comes to baking !), I couldn’t stop thinking (fantasizing ?) about these delicious cookies and as cherries are almost impossible to find here (the tinned ones are rare) I decided that I would adapt the recipe and use peaches instead, make the cookies bigger and turn them into “pies”.

So, here is my ‘take’ on the recipe (which I re-christened “Peach Pies” after all my adaptions) and the original recipe is on Nancy’s blog here. Thanks, Nancy for the inspiration !

Peach Pies

1 x 250 gm tub Cottage Cheese (Cream Cheese)
¾ cup Butter, room temperature
1 tsp Vanilla Essence
2 cups Flour
pinch of Salt
1 x 825 gm tin Peach Halves in Syrup, drained & sliced
Caster Sugar

Blend the cottage cheese and butter. Add vanilla essence and blend well. Add flour and salt and mix well. Pat in disc, wrap in plastic wrap and refrigerate for 1 hour.

Roll out on a floured surface and cut into 6 rounds (I used a small saucer as a template). Place a tablespoon or so of the sliced peach halves into the center and carefully fold over and seal edges with a fork.

Brush with a little milk and / or beaten egg before baking if you wish, and poke each pie a few times with a sharp knife to make slits for the steam to escape.

Place on a baking sheet. Bake at 180’C/350’F/Gas Mark 4 for about 20 minutes or until lightly browned. Cool completely as filling is HOT. Dust with caster sugar.

Makes 6 pies

Saturday, June 14, 2008

School Day Memories ... An Easy Melkos Recipe

Taking me right back to my boarding school days - a steaming bowl of Melkos, topped with cinnamon sugar. Delicious !

Do you have a food (or foods) that take you right back to your childhood ? A food which, if you were to eat it again today, takes you right back to the time when you last ate it – no matter how long ago ? One such food for me, is the South African pudding (dessert) known as Melkos.

I spent the final years of my senior schooling at a boarding school (‘hostel’) in Vryheid, South Africa. At that time, over 20 years ago, it was a predominantly Afrikaans town and the hostel was run by a group of Afrikaans “tannies” (an affectionate name which means “Auntie”) and boy, those ‘tannies’ could cook ! One of the dishes they used to make for us was Melkos. I had never eaten it before and my friends had to explain what it was to me, the first time it was served to us.

It is basically homemade noodles cooked in milk and served with cinnamon sugar. (Rather like a cross between hot porridge and a milky, custard type pudding ?) The floury noodles thicken the milk into a custard type delight !

Anyway, we used to be served this as a light dinner. Not after dinner … no – for dinner ! I remember always feeling a bit naughty eating ‘pudding’ as a main meal (“What would Mum say if she knew ?!”)

My husband refuses to eat Melkos. Or to even try it. He makes gagging noises turns his nose up when he sees it simmering away on the stove. “Yuck !” he proclaims “All that is, is just raw egg and flour boiled in milk. How can you EAT that stuff ?!?!” My daughter also doesn’t enjoy it …. but the dogs do, so they usually share half the pot with me. Put it this way, it’s probably an acquired taste. I mean, I wouldn’t serve it for pudding if you came around to enjoy a meal with us. Which got me thinking – who would I serve this Melkos to ? The only person I could come up with ? My (Afrikaans) brother-in-law, Dawid - I know that he’d enjoy it !

So, here is my favourite Melkos recipe which comes from the book “Cook and Enjoy It” by S.J.A. de Villiers -:


Melkos

Noodles:
3 eggs
½ tsp Salt
1 cup cake Flour
Water

Boiling Milk (I use 1 litre)
2 pieces stick Cinnamon (optional)
Cinnamon Sugar

Beat the eggs & salt lightly. Add the cake flour & mix well. Add sufficient water to make a stiff dough. Knead the dough thoroughly until elastic. On a floured surface, roll the dough out until 6 mm thick. Cut into thin strips with a sharp knife. Cook these strips in boiling milk, using 1 cup of Milk per person. Add 2 pieces of Cinnamon sticks if desired. Simmer for 20 – 30 mins until cooked through. Spoon into soup plates & sprinkle with cinnamon sugar.

Notes - This recipe serves 4 generously. You could cut the noodles a bit finer than the ones in the photo above (as they do expand & swell during cooking). The Melkos I remember eating had noodles as fine as spaghetti in it.

Wednesday, May 21, 2008

Malva Pudding Recipe (You just HAVE to try this one !)

Such a simple looking pudding - but don't be fooled ! It's spongy, almost honeycomb like texture & sweet, syrupy sauce is out of this world delicious .....

Malva Pudding. Ahhhh ….. the name does it no justice whatsoever. I think it should be renamed “I Think I’ve Died And Gone To Heaven Pudding”. It really is THAT good. Every time I’ve served it, I’ve had people ask me for the recipe - honestly !

Malva Pudding is South African, and originates from the Dutch. Any restaurant that serves traditional South African cuisine will have it on it’s menu. (Well … any restaurant worth it’s salt, that is !)

Some say the pudding was named after a lady called Malva and some say it was named after the dessert wine “Malvacea” (from Madeira) which traditionally, used to be served with it to end off a main meal. No matter the origin’s of it’s name … it is delicious, either way !

Such a simple sounding recipe ….. and such a simple looking result once it comes out of the oven – but don’t be fooled, this is possibly one of the tastiest pud’s you will ever eat !

This recipe comes from one of my all time favourite books “The Saffron Pear Tree (and other Kitchen Memories)” by Zuretha Roos. It’s a great book about Zuretha’s life growing up in South Africa (where she was born) and spans 3 generations of family recipes, with stories of her life in between. If you are interested in food and cooking, especially South African food, it is a must read.

A word of warning, however – only make it when you are expecting visitors to help you to eat it. Otherwise, you may find yourself standing (barefoot and belly full) guiltily licking the spoon and scraping the bottom of the empty pudding dish, wishing you hadn’t – and we don’t want that now, do we ?


Malva Pudding Recipe (from the book “The Saffron Pear Tree” by Zuretha Roos)

200 gm Sugar
2 Eggs
15 ml Apricot Jam (I use Strawberry Jam as we cannot get Apricot Jam here easily)
150 gm Flour
5 ml Bicarbonate of Soda
3 ml Salt
15 ml Butter (I have used Margarine – but butter is best !)
5 ml Cider or Grape Vinegar
100 ml Milk (I use Skim Milk)
5 ml Vanilla Essence

Sauce:

200 ml Cream (I have used Full Cream Milk or tinned Cream in place of this)
100 gm Butter (I have used Margarine – but, once again, butter is best !)
150 gm Sugar (I used brown Sugar)
100 ml hot Water

Preheat the oven to 180’C/350’F/Gas Mark . Beat the sugar & eggs well in a food processor (or with an electric mixer) until thick & lemon coloured, & add the jam, beating in.

Sift together the flour, soda & salt. Melt the butter & add the vinegar. Add this mixture & the milk & vanilla to the egg mixture alternatively with the flour. Beat well & bake in a covered oven proof dish for 45 minutes.

Melt together the ingredients for the sauce, stirring well, & pour it over the pudding as it comes out of the oven.

Serves 4.

(I usually serve this hot with custard).

Saturday, May 3, 2008

Pumpkin Fritters

A batch of pumpkin fritters being fried in oil

The first time I ever tried Pumpkin Fritters was when I was a child at boarding school in South Africa. They were usually served as a vegetable side dish to a main meal such as a roast. I vividly remember them being very oily, and the oil that oozed out of them was usually an orange colour – egh !

I make sure that mine are not too oily by ensuring that the oil I fry them in is VERY hot. I also always drain them on and blot them with kitchen paper after frying.

These can be served as a ‘savoury’ vegetable side dish but the way I like to eat them is as a dessert – sprinkled with a little cinnamon sugar and with some lemon juice squeezed over the top of them. (Can you tell that I have a sweet tooth ?!)

I know that Corn Fritters are popular in other parts of the world, but I must confess that I’ve never tried making any. Perhaps I should give them a try sometime, too ?

Pumpkin Fritters

2 cups Pumpkin, cooked & mashed (drain as much water off as you can before mashing)
5 heaped tbsp Flour
2 tsp Baking Powder
½ tsp Cinnamon, ground
pinch of Salt
1 Egg, beaten
Oil for frying

Mix all the ingredients together well. (The mixture will be a bit sloppy, but don’t worry). Drop tablespoons of the batter into the hot oil and fry until golden, turning a couple of times during the cooking process. Drain on kitchen paper and serve hot as either a side dish, or a dessert (see my suggestions above).

Sunday, April 27, 2008

Tanzanian Tangawizi Bananas (& A Tarangire Story)

These are best served with vanilla ice cream - off a freshly picked banana leaf (pictured) - if you happen to have one handy !

When we first came to Tanzania in 1998, we ran a luxury tented camp in the 2600 sq km Tarangire National Park, which is a beautiful park in the North of the country, known for it’s “forests” of Baobab trees, elephants herds in the hundred’s and birdlife - it has the highest concentration of breeding bird species in the world. (If you’d like to read more about this amazing park, which used to be my home, you can go to the Tanzania National Parks website’s Tarangire page here).

I had the pleasure of working with a local Tanzanian chef there called Mbise and to this day he is hands down, the BEST chef I have ever worked with. Such a talented young man … when our employer went bankrupt we moved on, and Mbise came with us. He is now a first class chef working for one of the top hotel operators in the country, and I am very proud of what he has achieved. I have never – before or since – eaten food as good as his.

Like most chefs, he had a fiery temper and one day him and I came to blows over some trivial thing (living in a tent in the bush for 3 months with no telephones, no TV and no internet will do that to you !) and I was horrified that evening when he ‘got his own back’ on me, by serving me a stew for supper which contained both green pepper AND mushrooms (two things I cannot – will not – eat). Of course he was well aware of this, and when I approached him about it he acted sorry and said it was a mistake, he had “forgotten” – ha … but I knew better !

That was the first and last disagreement we ever had, and we are still in contact 10 years later (and I’m happy to say, no more green peppers or mushrooms have ever come between us !)

Anyway, he used to cook the most amazing banana dessert and it was something – as far as I know – that he had come up with himself one day. It was a great “stand-by” dessert for whenever we had unexpected guests or were low on camp supplies. I wish I had the actual recipe but I don’t, so I have tried to recreate it over the years (just going on my memory of the flavours, and watching him cook it – I’ll have to ask him for it the next time I see him, & post it on the blog) and this is as close a match as I can get ….. the recipe uses fresh ginger which is known as “Tangawizi” in the local Kiswhahili language, so seeing as this is not Mbise’s exact banana recipe, I have re-invented it and named it ‘Tanzanian Tangawizi Bananas” -:


Tanzanian Tangawizi Bananas

1 tbsp Butter
2 tbsp brown Sugar
½ tsp fresh Ginger, finely grated
5 finger bananas, sliced lengthways
½ tbsp fresh Lime (or Lemon) Juice

Melt the butter in a hot pan until foamy, then add the sugar and stir on a lower heat until it has dissolved & becomes like caramel (be careful not to let it burn !) Add the ginger, stir and then add the bananas. Toss the bananas to coat them and keep turning them until they just begin to soften around the edges. Add the lime juice, stir to blend and serve the bananas hot with the caramel sauce poured over them.

These are great served straight off a banana leaf with vanilla ice cream, which melts on contact with the hot bananas – ahhhhh, heaven on earth !

Saturday, April 26, 2008

Strawberry Squares

You could substitute the strawberry jam for apricot jam (or any other), too

Here is an easy and tasty biscuit recipe for you to try, which can also be served as a dessert.


You could substitute the strawberry jam for apricot jam or any other type of jam that takes your fancy.

If served as a dessert, I usually cut the squares a little larger and serve warm with custard.


Strawberry Squares

125 gm Margarine
4 tbsp Sugar
3 tbsp Milk
2 cups Flour
3 tsp Baking Powder
pinch of Salt
1 Egg, beaten
½ jar of Strawberry Jam

Cream the margarine & sugar together. Then add the milk and the beaten egg. Blend well. Then sift in the flour, baking powder and salt. Knead to form a soft dough. Press two thirds of the dough out in to a greased baking tray and spread the jam over the top of it. Then grate the remaining dough over the top of the jam layer. Bake at 180’C/350’F/Gas Mark 4 for 20 – 30 minutes. Cut in to squares whilst still hot.

Tuesday, April 22, 2008

Peach & Cardamom Crumble

Here the crumble is served with cream, but it tastes just as delicious served with either custard or ice cream

This is my own recipe which I came up with one quiet Saturday afternoon several years ago when we were living on another farm. I was inspired by the Cardamom which a lot of the local people use here in tea and for baking (cakes, especially), I had never cooked with it before - and so my Peach and Cardamom crumble was born !

The Cardamom in this recipe gives the peaches a lovely, warm flavour and the addition of milk powder to the topping gives this crumble a rich, buttery flavour.

Cardamom comes from a reed like plant grown in Tanzania. The Cardamom seeds (extracted from the pod) are crushed into a powder, which is used for cooking & baking. Although you can buy the powder, I prefer to keep the pods on hand and crush the seeds myself, as the flavour is more intense this way..


Peach & Cardamom Crumble

410 gm Tinned Peaches, sliced
½ tsp Cardamom, ground
190 ml Flour
125 ml Brown Sugar
60 ml Milk Powder
70 gm Margarine

Place the sliced peaches into a buttered pie dish. Sprinkle the ground Cardamom over the peaches, & mix to coat. In a separate bowl, blend the flour, sugar, milk powder & margarine together to resemble fine bread crumbs. Sprinkle over the peaches, pat down lightly and bake at 190 ’C/375 ’F/Gas Mark 5 for 30 minutes until golden brown. This crumble is delicious served hot or cold with custard, cream or ice cream.