Showing posts with label Baking - Biscuit and Cookie Recipes. Show all posts

Thursday, September 2, 2010

Oatmeal Cereal Cookies

Crisp & crunchy, these Oatmeal Cereal Cookies are a hit every time !

These Oatmeal Cereal Cookies are delightfully crisp and crunchy & are always a hit with our entire family ! They’re great with tea and make a nice lunchbox filler, too.

The recipe states that it makes 14 cookies, but I always manage to get 30 decent sized cookies (rolling walnut sized balls before flattening). These cookies do spread out a little during baking – so be sure to place them a little distance apart on your baking sheet -:

Oatmeal Cereal Cookies (taken from the book ‘Cookies’ published by ‘Pick ‘n Pay’ Supermarket)

175 gm/6 oz/¾ cup Butter (at room temperature, plus extra for greasing)
150 gm/5 oz/¾ cup Sugar
1 Egg Yolk
175 gm/6 oz/1 ½ cups plain flour, plus extra for dusting
5 ml/1 tsp Bicarbonate of Soda
2.5 ml/½ tsp Salt
50 gm/2 oz/scant ½ cup rolled Oats
50 gm/2 oz/scant ½ cup crunchy Granola type cereal (I use puffed rice or cornflakes)

With an electric mixer, cream the butter & sugar together until light & fluffy. Mix in the egg yolk. Sift over the flour, bicarbonate of soda & salt, then stir into the butter mixture. Add the oats & cereal & stir to blend. Chill for at least 20 minutes. Preheat the oven to 190’C/375’F/Gas Mark 5. Grease a baking sheet. Roll the dough into balls. Place them on a baking sheet & flatten with the bottom of a floured glass (I use a fork & also sprinkle brown sugar over the tops before baking). Bake for 10 – 12 minutes, or until golden. Transfer to a wire rack to cool. Makes 14.

Saturday, July 24, 2010

Strawberry Biscuits (Cookies)

These Strawberry Biscuits (Cookies) are soft & buttery and the slight tartness of the fresh strawberry pieces inside them make for a delicious treat !


It’s Winter here in Africa, and strawberries (which just happen to be my favourite fruit) are an abundant Winter fruit here, especially during the month of July - I always consider July as being ‘strawberry month’ !

I have featured various strawberry recipes on the blog in the past, but never one for biscuits (cookies) made with actual fresh strawberries, so thought that I would share this one with you, which I made last weekend.

These biscuits are soft and buttery and the slight tartness of the strawberry pieces in them work well with the overall sweetness of the biscuit – and they go perfectly with a nice cuppa tea, of course !


Strawberry Biscuits (Cookies)
(Adapted from the ‘Sugar Biscuits’ recipe in ‘Cook and Enjoy It’ by S.J.A. de Villiers)

½ cup Butter
1 cup brown Sugar
1 Egg, beaten
2 tbsp Milk
1 tsp Vanilla Essence
½ tsp Salt
2 ½ cups Flour
2 tsp Baking Powder (Baking Soda)
1 cup fresh Strawberries, cleaned & roughly chopped

Cream the butter & sugar together until light and fluffy. Add the beaten egg, milk, vanilla essence & salt. Mix well. Sift the flour and baking powder in. Mix. Fold in the chopped strawberries. Knead the dough lightly and roll pieces into walnut sized balls. Place on a lightly greased baking sheet, press each ball down lightly with your thumb to flatten. Bake at 190’C/375’F/Gas Mark 5 for around 12 - 15 minutes until done. Makes +- 35 biscuits.

Wednesday, May 19, 2010

Quick & Easy Cinnamon Cookies

These soft, buttery cinnamon cookies melt in your mouth when you eat them ..... mmm !

This is a quick and easy recipe for a deliciously soft and buttery cinnamon cookie that is crumbly and melt-in-your-mouth delicious when you eat it …... mmmmmm ! It comes from one of my Granny’s old recipe books, which was published in 1929.

If you need to convert the measurements into ones which are more convenient for you, simply scroll to the end of this page and click on the ‘Conversion Calculator’.

(For my 'Cottage Cheese Cinnamon Biscuits' recipe click over here.)


Quick & Easy Cinnamon Cookies (from ‘Anyone Can Bake’, published in 1929 by ‘Standard Brands Incorporated’)

3 tbsp Butter
3 tbsp Sugar
1 Egg, beaten
6 tbsp Flour
1 tsp Baking Powder
Cinnamon & Brown Sugar for dusting

Cream the butter and sugar together. Add the beaten egg. Sift in the flour & baking powder. Roll into walnut sized balls, then roll the balls in a mixture of brown sugar & cinnamon and place on a lightly greased baking sheet – no need to press them down as they will spread out nicely as they bake. Bake at Gas Mark 5/190’C/375’F for around 25 minutes. Makes 18.

Tuesday, May 4, 2010

Lemon & Ginger Biscuits (Cookies)

The lemon zest - along with the ginger - make for a tasty biscuit

This is the 28th biscuit (cookie) recipe I’ve posted on the blog, which I guess tells you just how often I bake them ! Our ‘biscuit tin’ is usually always full, just as it was when I grew up as a child as my mother always kept ours well stocked – it’s funny just how many food ‘traditions’ like this we carry on into our own homes as adults, don’t you agree ?!

This 'Lemon and Ginger' biscuit recipe I came up with a while ago would have been nice with some crystallised ginger added, only we can’t get it here easily – so if you have it, you can try adding a few tablespoons to this recipe, if you like.

As with all my recipes, you can scroll to the bottom of this page for the recipe ‘Conversion Calculator’ to convert ingredient quantities into those measurements which suit you best -:


Lemon & Ginger Biscuits (Cookies)


110 gm Butter
250 gm Sugar
1 Egg, beaten
1 ½ tbsp Lemon Juice
1 tsp Lemon rind, finely grated
450 gm Flour
1 ½ tsp ground Ginger
½ tsp Salt
2 tsp Baking Powder
Water

Cream the butter and sugar together until light and fluffy. Add the beaten egg, lemon juice and lemon rind. Mix well and then sift in the flour, ground ginger, salt and baking powder. Mix to form a manageable dough (add a splash of water if the dough is too dry). Shape dough into walnut sized balls & place on a lightly greased baking sheet. Press each ball with the back of a fork to flatten slightly. Bake at Gas 5 for around 15 minutes until golden.

Tuesday, March 23, 2010

Peanut Butter Squares with a Chocolate Drizzle

A crunchy chocolate drizzle really adds to the flavour of these tasty peanut butter squares

Chocolate and peanut butter are always a great combination, and when I made these Peanut Butter Biscuits the other day, I decided to add a chocolate topping to them for this very reason. This topping is hard and crunchy once it sets, and adds just the right amount of chocolate-y flavour !

I also decided to adapt the original recipe and make squares instead of round biscuits (cookies) – only because I was too lazy to stand and roll little balls from all that dough !

The squares worked out really well and I think I will stick to doing them this way in the future, too ….


Peanut Butter Squares with a Chocolate Drizzle
(adapted from the recipe ‘Peanut Butter Biscuits’ from ‘The Complete South African Cookbook’ by Magdaleen Van Wyk)

85 gm Butter (or Margarine)
250 ml (1 cup) Sugar
1 Egg, beaten
125 ml (1/2 cup) Peanut Butter
375 ml (1 ½ cups) Flour
4ml (3/4 tsp) Baking Powder
1 ml (1/4 tsp) Salt
5 ml (1 tsp) Vanilla Essence

Cream the butter or margarine and sugar together in a mixing bowl until light & creamy. Stir in the beaten egg, mixing well to blend, then stir in the peanut butter. Sift in the dry ingredients, mixing well. Stir in the vanilla essence. Knead the mixture lightly to form a smooth, stiff dough & then roll pieces of the dough in to small balls. Place the balls on a greased baking sheet & press them flat with a fork (place them well apart to allow for expansion when baking).* Bake at 180’C/350’F/Gas mark 4 until firm, around 15 minutes. Allow to cool before transferring to a wire rack to cool completely.

*I pressed the mixture flat into a greased baking pan and once baked, cut it in to small squares and topped it with the following -:

Topping:
4 tbsp Sugar
1 tbsp Cocoa Powder (Unsweetened)

Melt the sugar and cocoa powder together in a small saucepan, stirring just to blend. Remove from heat and with a spoon, quickly drizzle the mixture in a zig zag motion across the top of the baked squares (still in the pan). (You have to work quickly as the topping sets quite quickly once removed from the heat !)

Saturday, February 6, 2010

Ouma Ellen's Strawberry Jam Biscuits

The original recipe calls for Apricot jam, but I used Strawberry jam instead

I have no idea who ‘Ouma Ellen’ is, but I can tell you that the word ‘Ouma’ means ‘Granny’ in the South African language of Afrikaans. So, this is ‘Granny Ellen’s’ recipe and it comes from one of my favourite South African cook books ‘Cook and Enjoy It’ by S.J.A. de Villiers.

I have adapted this recipe slightly – some of the measurements were in cups, some in litres/ml’s and some in grams – quite confusing, so I have adjusted them so that they are all the same. The original recipe also calls for Apricot jam but I used Strawberry jam for mine, and I adjusted the recipe as the original recipe yielded 130 to 140 biscuits (cookies) – oh my word, Granny Ellen must’ve been baking biscuits for the entire ‘dorp’ or village, at that rate !

Anyway, thanks to Granny Ellen, here is the recipe -:


Ouma Ellen’s Strawberry Jam Biscuits

*note – I used a 300 ml cup to measure ingredients for this recipe (that’s around 11 fluid ounces).

2 cups Flour
Pinch of Salt
½ cup Margarine (or Butter)
1 tsp Bicarbonate of Soda
¼ cup Strawberry Jam
¼ cup Sugar

Sift the flour & salt together. Rub the margarine (or butter) in with your fingertips. Mix the jam and bicarbonate of soda together (it will go light & foamy) and add to the flour/salt mix, then add the sugar. Blend everything together and knead until smooth. Roll out the dough (about 6 mm thick) and cut into rounds with a biscuit cutter and then cut out a small round in the centre of each biscuit. Place on greased baking trays and bake for 15 minutes at Gas Mark 5/190’C/375’F.

Makes around 30 biscuits.

Tuesday, February 2, 2010

Cheese & Marmite Balls

Marmite - as the slogan goes - you either love it, or you hate it !


These Cheese & Marmite balls melt in the mouth with salty, buttery deliciousness !

This recipe is one I’ve been making since I was a teenager (don’t ask how many years ago that was !) It’s quite unusual, I think – I haven’t ever come across the recipe in a book or anywhere else (my Mum got it from a friend of hers in South Africa).

I know that some readers may not be familiar with Marmite. It’s something that you truly either love or hate – I imagine that if you haven’t grown up eating it, you’ll probably dislike it as it does take some getting used to. It originates in the UK and is basically a sticky dark brown (savoury) paste that you use as a spread on sandwiches, toast etc and can also be used to flavour soups, stews and gravies. It is very salty & is described as a ‘yeast extract’ (the method of making it, aswell as the exact ingredients, are one of those closely guarded culinary secrets !)

I believe that Vegemite is the New Zealand alternative to Marmite – I’ve tasted Vegemite before and it is not as strong tasting as Marmite.

This recipe uses Marmite as a filling – and also offers the alternative of Apricot jam. The apricot jam works well, and I imagine that fig jam would, too.

I’ve made these for both an afternoon tea party and as snacks served with sundowners & both times they’ve gone down well - the cheese/butter combination makes them ‘melt-in-the-mouth’ delicious !


Cheese & Marmite Balls

250 gm (9 oz) Butter
250 gm (9 oz) Cheddar Cheese, grated
375 gm (13 oz) Flour, sifted
1 tsp (5 ml) Baking Powder
½ tsp (2,5 ml) Salt
For filling : Marmite; Apricot Jam

Mix all the ingredients together and shape into small (walnut sized) balls. Make a hollow in the top of each ball (the end of a wooden spoon works well for this) & into this, spoon your choice of filling – Marmite or Apricot jam (you can fill half the batch with Marmite, and the other half with Apricot jam). Bake at Gas Mark 4/350’F/180’C for 15 minutes. (Allow to cool down completely before eating as the filling will be piping hot !)

Sunday, January 17, 2010

Custard Powder Cookies

These melt-in-the-mouth Custard Powder Cookies are simple to make, and are ready in just 15 minutes ....


What with all the excitement of the recent festive season and being away on safari, I haven’t published many recipes on the blog lately – so I thought it was about time for one – and a quick, simple one at that ….

I’ve been making this recipe since I was in Primary school – in fact, it was probably one of the first recipes my Mum let me bake completely alone with no adult supervision.

With the ‘back to school’ season upon us now again too, these are fantastic for popping in to lunch boxes. (I don’t think that when I baked these for the first time as a child myself all those years ago, I ever thought I’d be baking them years down the line for my own daughter, though !)

These cookies are small enough to pop whole into your mouth all at once if you feel the urge (!!) and they have a lovely, melt-in-the-mouth texture, too. Enjoy !


‘Foolproof’ Custard Powder Cookies

100 gm Icing Sugar (Confectioners sugar, used for frosting ?)
100 gm Custard Powder (for me, only this one will do) - *see note at end of recipe for more info on what Custard Powder is*
300 gm Flour
300 gm Butter

Mix all the ingredients together. Work with hands into a paste, shape into small walnut sized balls on a greased baking tray. Press down with a fork to flatten slightly. Bake at 400’F/200’C/Gas Mark 7 for 10 to 15 minutes. Once cooled, you can dust with icing sugar if you like.

*What is Custard Powder ? This extract taken from 'Wise Geek' (see the full article here)"Custard powder looks a lot like cornflour (cornstarch), and in fact, is made from cornflour. It also has coloring , salt and other flavorings. The cook combines several tablespoons of the custard powder with sugar and enough milk to form a paste. The paste is then slowly added to hot milk and stirred until completely dissolved. The result is a thick custard sauce, not identical to traditional egg custard, but still good over cake, pudding or other desserts."

Wednesday, December 16, 2009

Sugar 'n Spice Christmas Cookies

I used pink icing for these as I had no red in the house - but I still think that they have a pretty, festive feel to them - don't you ?!


What is a home without a fully laden cookie jar (or in our house, a biscuit tin or barrel) over the festive season ?! (You can see the ones I made last year over here) Cookies are easy to make and are enjoyed by everyone. They also store well and are great to have on hand for when unexpected visitors pop around (which, I’ll be honest, does not happen that often on our – rather remote – farm !)

These cookies below make great hostess gifts over the holidays – place them in a pretty tin, nestled on a bed of red and green tissue paper or wrap them in red cellophane and tie with a big green bow & give to someone as a ‘thank you’ or a ‘happy Christmas’ present. You could even write the recipe out on a pretty card and include it with the cookies, so that the recipient can make them themselves sometime.

If you do make these cookies, please remember to leave a few out for Father Christmas to eat when he visits your home on Christmas Eve to deliver all your presents. I know from first hand experience, that he really does enjoy them. Ho ho ho …. Happy Christmas cookie baking, everyone !


Sugar ‘n Spice Christmas Cookies (adapted from the “Sugar Biscuits” recipe by S.J.A. de Villiers “Cook & Enjoy It” book)

½ cup Butter
1 cup Brown Sugar
1 Egg
2 tbsp Milk
½ tsp Vanilla Essence
2 ½ cups Cake Flour
2 tsp Baking Powder
1 ½ tsp ground Cinnamon
1 tsp ground Nutmeg
1 tsp ground Mixed Spice
½ tsp Salt

Cream the butter & sugar together until light and fluffy. Add the egg, milk and vanilla essence & continue beating until well combined. Add the sifted flour, baking powder, cinnamon, nutmeg, mixed spice and salt. Mix well, kneading to form a dough. Cover & place in the fridge to cool for about an hour before rolling out +- 3 mm thick and using a cookie cutter to cut shapes out. Place on a greased baking sheet and bake at 190’C/375 ’F/Gas Mark 5 for about 10 minutes until golden.

Decorating Ideas :

Allow to cool and decorate with a piping bag filled with coloured icing (or you can cheat like I did, and buy the ready made icing tubes !) You could use white icing to create a snowflake design, and green and red for edging the biscuits or making star designs. You can also use edible gold or silver balls to decorate the cookies for an extra festive look.

Tuesday, October 27, 2009

Treacle Biscuits (Cookies) - Great For Dunking !

Another great dunking biscuit - these Treacle Biscuits always go down a treat !


This is another quick and easy biscuit (cookie) recipe which is great for keeping your biscuit tin (or cookie jar) full !

They are quite hard once baked, so are ideal for dunking into a nice cuppa tea or coffee -:


Treacle Biscuits

200 gm (7 oz) Butter
200 gm (7 oz) Brown Sugar
200 gm (7 oz) Treacle (or golden corn syrup, if you can't find treacle)
1 Egg, beaten
560 gm (20 oz) Flour
1 tbsp Bicarbonate of Soda
pinch of Salt

Cream the butter & sugar together. Add the treacle and egg and mix before adding the sifted flour, bicarbonate of soda and salt. Mix until a soft dough is formed. Roll into walnut sized balls and place on a greased baking sheet, pressing each one down lightly with a fork before baking at 190’C/375’f/Gas Mark 5 for around 25 minutes until golden.

Friday, August 28, 2009

Crunchy Cornflake Cookies

These crunchy cornflake cookies are great for lunchboxes - and dunking, too !

I seem to somehow have ended up with 2 large opened boxes of cornflakes which need using up before they start going stale, so I decided to make some Cornflake Cookies with some of them the other day - these are another great lunchbox filler, and a hit with both kids and adults alike ! (I love dunking these into a nice cuppa tea ……………..)


Crunchy Cornflake Cookies


½ cup Butter
1 cup brown (or white) Sugar
1 Egg, beaten
2 tbsp Milk
1 tsp Vanilla Essence
2 cups Flour
2 tsp Baking Powder
pinch of Salt
2 cups Cornflakes (reserve 2 tablespoons for decorating)

Cream the butter and sugar together until light & fluffy, then add the beaten egg, milk and vanilla essence and stir to blend well. Sift the flour, baking powder and salt into the mixture and stir to blend a little, before adding the cornflakes. Mix to combine. Roll the mixture into small balls, pressing each one down lightly with a fork to flatten as you go along (dip the fork in flour to prevent sticking). Press a few cornflakes in to the top of each cookie before baking at 190’C/375’F/Gas Mark 5 for around 15 minutes until golden. Remove from oven and cool on a wire rack. Makes around 35 cookies.

Wednesday, August 12, 2009

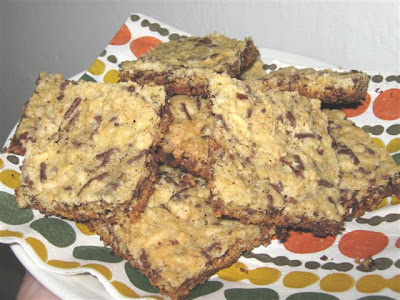
Oaty Chocolate Squares

These Oaty Chocolate Squares make a great school lunchbox treat

It’s been well over a year since my daughter started pre school and I rather nervously wrote a post about it over here. I can’t believe how quickly the time has passed since then. The 01st September (officially ‘Spring Day’ here in Africa) this year is when her new school year begins again, and she will once again be attending twice weekly whilst I home school her for the other 3 days on the farm.

So, I am already starting to think about things like school lunchbox contents and breakfast/lunch options which can easily be eaten in the car. Here is one of the new recipes I’ve come up with for a school lunchbox treat – Oaty Chocolate Squares.

For this recipe I’ve used a mixture of white and dark chocolate Vermicelli strands – the exact same type you would use for decorating a cake with (they don’t melt when you bake them). You could just as easily use chocolate chips though – I don’t because we cannot buy them here that easily. (Come to think of it, you could also just use finely chopped chocolate !)

As this is a new recipe I’m ‘experimenting’ with, I thought afterwards that next time I might add a handful of finely chopped dried fruit (like apricots or apples) to the mix, and see how that works out. I think that the combination of oats, dried fruit and chocolate would work quite well – and taste almost like some of those shop bought cereal bars ?


Oaty Chocolate Squares

¼ (62,5 ml) cup Margarine (or Butter)
½ cup (125 ml) brown Sugar
½ cup (125 ml) Flour
¼ tsp Bicarbonate of Soda
¼ tsp Baking Powder
Pinch of Salt
1 Egg, beaten
¼ tsp Vanilla Essence
½ cup (125 ml) rolled Oats
½ cup (125 ml) mixed white and dark Chocolate Vermicelli (or Chocolate chips)

Cream the margarine (or butter) and sugar together in a bowl. Then add the sifted the flour, bicarbonate of soda, baking powder and salt to the mixture, along with the egg and vanilla essence. Mix until well blended, then stir in the oats and chocolate chips (or Vermicelli). The mixture will be quite crumbly. Spread the mixture into a lightly greased baking tray, pressing it down lightly with the back of a large spoon (dipped in flour to prevent sticking), so that the surface is smooth and even. Bake at 180’C/350’F/Gas Mark 4 for about 20 minutes until done. Remove from oven and cut into squares whilst still hot. Allow to cool a little before removing from the baking tray.

Monday, June 29, 2009

Meeting New Friends, Afternoon Tea & Seaside Biscuits !

Seaside Biscuits - best enjoyed with a nice cuppa tea & a sea view !

My parents have many friends - both old & new - who live in this area of the Eastern Cape, along with family (our cousins - who live nearby - are also farmers - they grow tomatoes in tunnels, along with other veg like butternut squash which they farm out in the open).

As my parents have just moved here, they've had many visitors coming around to see their new home, and I have come to meet some of them during the past week I've been here. One couple, after spending the afternoon with us, said to me on leaving 'Lovely to meet the face behind the blog, it will have a much more personal feel now when we read it, having met you ourselves !' & I felt a bit embarrassed because well, my blog is like my 'online' life and sometimes it's quite strange when 'real' and 'online' life meet rather unexpectedly - if any other bloggers out there can relate to this odd feeling ? (Or is just me who's odd ?!) Anyway, it was lovely to meet people who read my blog & enjoy it .....

So, back to all the visitors .... we have been having lots of afternoon tea's and delicious treats to eat (never mind trying to get rid of the post pregnancy waistline *ahem*) and this is just one of the yummy recipes my Mum made for tea last week. I've called them 'Seaside Biscuits' (Cookies)as they are best enjoyed beside the sea - and I have to admit, nothing tastes quite as good as the food/treats made for you by your Mum .... no matter how old you are !


Seaside Biscuits (Cookies)

250 gm Butter, softened
250 gm Icing Sugar, sifted
1 Egg, lightly beaten
1 tsp Vanilla Essence
2 1/4 cups Flour, sifted
pinch of Salt
1 tsp Baking Powder
1/2 cup Raisins

Cream butter & icing sugar together until pale & fluffy. Slowly add the egg & vanilla essence and combine well. Sift the flour, salt & baking powder and add to the mixture. Stir in the raisins. Mix well and press into a ball. Wrap in cling film and leave in the fridge for around 30 minutes (it will keep for up to 3 days in the fridge, if you'd like to prepare it well beforehand). Remove, then shape mixture into biscuit shapes as desired, place on a greased baking sheet and bake at 160'C/325'F/Gas Mark 3 for 12 to 15 minutes until golden brown.

Friday, May 1, 2009

Chocolate Wheels - and Memories !

These chocolate wheels are really just slightly fancier versions of your basic chocolate/vanilla biscuit (cookie)

I found this recipe for Chocolate Wheels (which are really just a type of biscuit/cookie) in a magazine when we lived in the (now) city of Arusha, Tanzania about 8 years ago (I say ‘now’ as it has recently been granted city status whereas in those days it was still considered to be a ‘town’). My Mum used to regularly send South African magazines to me, and this came from one of them – although I can’t remember which one now !

Anyway - at the time I was working full time, running a busy restaurant on the outskirts of the city and also managing the coffee lodge adjacent to it, which had just opened it’s doors for the first time – so we were still in the initial teething stages. I was working 24/7 and eating most of my meals at the restaurant whilst on duty, but employed a head houseman & cook (his name was Godwin) to prepare all the meals we ate at home. I have fond memories of teaching Godwin how to make these Chocolate Wheels, and every time I make them now - as I'm kneading & rolling & cutting the dough - I think back to that rather hectic time in my life.

The recipe lasted longer than Godwin did I’m afraid, as we had many problems with him and he started drinking quite excessively and not caring for the animals properly – so we had to let him go in the end, soon after we'd moved to the farm we lived on before this one. I then slowly trained up Godwin’s cousin, who was also our part-time gardener (who also performed askari/night watchmen duties for us) to work in the house and the rest, as they say, is history as his name was Justin and yes, he is the same Justin who's been with me ever since !

Chocolate Wheels

175 gm Butter
80 gm Icing Sugar
500 gm Flour, sifted
¼ cup Milk
15 gm unsweetened Cocoa Powder, sifted

Cream the butter & icing sugar together until light and fluffy. Add the flour & milk to this, & mix/knead well to blend. Split the dough in half, leaving half plain and adding the cocoa powder to the other half, blending it into the dough well.

Chill in the fridge for about an hour & then remove and roll each part of the dough (separately) into a rectangular shape on a lightly floured surface. (Trim off the excess pieces of dough so that both rectangles are the same shape and size.)

Now place the chocolate rectangle of dough on top of the plain rectangle of dough & gently roll both up together to form one long sausage shape. Wrap this long roll of dough tightly in plastic wrap & place back in the fridge for another hour.

Remove from fridge and slice the ‘sausage’ of dough into even pieces/rounds. Place on a lightly greased baking sheet and bake at 180’C/350’F/Gas Mark 4 for 10 to 15 minutes until done.

Makes around 25 to 30 biscuits (cookies) depending on how thickly you cut the ‘sausage’.

Wednesday, April 15, 2009

Coffee Biscuits (Cookies)

These coffee biscuits taste great on their own or dunked into a nice cup of coffee or tea ! (Pictured with a tin of "Africafe" which is one of Tanzania's great instant coffee's & my husband's absolute favourite !)

This is a recipe I came up with some time ago when I was craving a coffee flavoured biscuit (cookie) & all the recipes I came across in my recipe books seemed too fiddly or complicated – all I wanted was a quick and easy recipe, so this is what I came up with -:


Coffee Biscuits (Cookies)

1 ½ cups Flour
2 tsp Baking Powder
pinch of Bicarbonate of Soda
5 tbsp brown Sugar
3 tsp Instant Coffee Powder
½ cup Margarine (or Butter)
2 tbsp Milk

Sift the flour, baking powder, bicarbonate of soda, sugar & instant coffee powder into a bowl. Rub in the margarine (or butter) with your fingertips, until mixture resembles fine bread crumbs. Add the milk and stir and mix to form a manageable dough. Roll walnut sized balls of the dough and place on a greased baking sheet. Press with the back of a fork to flatten. Bake at 190’C/375’F/Gas Mark 5 for around 30 minutes until done. Makes around 30 biscuits.

Sunday, March 1, 2009

Cottage Cheese Cinnamon Biscuits

The crunchy cinnamon sugar topping on these biscuits really enhances their taste

I’ve been making this recipe for years, & I honestly couldn’t tell you where it originated from as it is one of those loose typed recipe sheets stuck into a recipe ‘scrapbook’ of mine. They are made with Cream Cheese - what we call "Cottage Cheese" here in Africa (I have no idea why !)

Your kitchen will smell wonderful as these bake – a lovely buttery, cinnamon-y sweet scent that fills the whole house, and cries out for you to put the kettle on for a nice cuppa tea to go with them as they come piping hot out of the oven ! Mmmmmm ……………….


Cottage Cheese Cinnamon Biscuits

½ cup Margarine (or Butter)
¼ cup plain Cottage Cheese (or Cream Cheese)
1 cup Caster Sugar (fine white sugar)
1 Egg, beaten
1 tsp Vanilla Extract
3 cups Flour
½ tsp Baking Powder
½ tsp Cinnamon Powder

Topping:
¼ cup brown Sugar
3 tsp Margarine (or Butter), melted
2 tsp Cinnamon powder

Cream the margarine, cottage cheese and caster sugar together until light and fluffy. Add the egg and the vanilla extract, & continue beating. Sift in the flour, baking powder & cinnamon powder and mix well to blend and to form a soft dough. Place the dough, covered, in the fridge for about ½ hour or until firm (this makes it much easier to handle/roll). Roll flat on a floured surface and cut biscuit shapes out of the dough with a biscuit cutter & place on a lightly greased baking tray.

Mix the topping ingredients (sugar, melted margarine & cinnamon) together & spoon/spread on top of each biscuit, before baking at Gas Mark 5/190’C/375’F for 10 to 12 minutes until golden.

Thursday, February 12, 2009

Butter Cookies

You can decorate these butter cookies with chocolate chips, sprinkles, nuts - or anything which takes your fancy !

This is one of my standard “go to” cookie (biscuit) recipes as it is so easy to make & they turn out perfectly every time.

We recently went to lunch at a friend’s farm and I baked a batch of these to take with us as a ‘thank you’. They were served after lunch with tea & coffee, and everyone must’ve enjoyed them as there were all eaten up !

You can leave the dough plain, or mix some chopped cherries or grated chocolate into it (or both !) before baking. Chocolate sprinkles also work well when mixed into the dough. On this particular day I left the dough plain & decorated the tops with a selection of chocolate or rainbow sprinkles and edible silver balls – my daughter had great fun helping with this, as you can imagine !


Butter Cookies (from “The Complete South African Cookbook” by Magdaleen Van Wyk)

2 cups self-raising Flour
pinch of Salt
120 gm Butter
½ cup caster Sugar
1 large Egg
2 ml Vanilla Essence

Sift the flour & salt together in a bowl. Beat the butter & sugar in a separate bowl until smooth & creamy. Beat in the egg, to form a smooth mixture. Mix in the sifted flour & salt, then stir in the vanilla essence, blending well. Chill in the fridge for 15 minutes. Take small portions of the dough & shape into balls*. Place them 5 cm apart on a greased baking sheet. Bake at 180’C/350’F/Gas Mark 4 for 15 minutes. Cool on a wire rack.

* I roll my dough out on a lightly floured surface & use cookie cutters to cut shapes for this recipe, as I find it less time consuming that rolling it into balls, and the cookies still come out just as well ! I gently press the sprinkles into the top of each cookie before baking, so they are baked with the sprinkles already on (they stick better this way).

Saturday, January 31, 2009

Jumbo Oatmeal Cookies

These Oatmeal Cookies are great for school lunchboxes !

This cookie recipe is great for lunchboxes & I made a big batch of them just before my daughter was due to return to school recently.

I was actually also trying to use up the porridge oats in my store cupboard as one of the foods I’ve completely gone ‘off’ since falling pregnant is oats, of all things ! Seeing as they used to be my standard everyday breakfast, and also as my husband doesn’t eat them (my daughter has them now and again) I have quite a supply which need to be used up, and this recipe helped me to do just that ….

Jumbo Oatmeal Cookies (from “The Ultimate Vegetarian Collection” by the Lions Club of Menengai, Nakuru, Kenya)

250 gm Butter (I use Margarine)
160 gm Sugar, ground (I use Caster/fine sugar)
250 gm self-raising Flour
125 gm Jumbo Porridge Oats (I use normal porridge oats)
100 gm desiccated Coconut (I use Muesli & a handful of flax/pumpkin seed mix instead)
1 tsp Bicarbonate of Soda
¼ cup warm Milk (approx.)
For Topping : 2 parts Jumbo oats & 1 part desiccated coconut (optional)

Beat butter & sugar until light and fluffy. Add remaining ingredients & mix gently with a wooden spoon. Add a little milk if required & knead into a soft dough. Make +- 50 balls. Mix ingredients for topping. Roll balls in the topping mix & arrange on lightly greased baking trays. Bake cookies in a pre-heated oven at 180’C/350’F/Gas Mark 4 until light brown (+- 20 to 30 minutes)

Saturday, January 10, 2009

Passion Fruit Cream Biscuits (Cookies)

Delicate & delicious, these passion fruit biscuits were a hit with the entire family !

Passion fruit (otherwise known as ‘Granadillas’) are quite common here and in most local restaurants you will find freshly squeezed passion fruit juice on the menu.

I am not too fond of them myself (perhaps because of all the pips which tend to get stuck in your teeth when you eat them ?!) but usually have a few in the house as my daughter enjoys eating them (scooping the pulp out with a spoon is always great fun for her !) They are also nice to add to a fruit salad.

This is an unusual and very tasty biscuit (cookie) recipe using passion fruit pulp. It is unusual in that the batter contains both glace ginger & ginger powder (aswell as some lemon juice and rind) which really seems to work well with the passion fruit. The flavours are further enhanced by the delicious passion fruit cream which sandwiches the biscuits together. (I leave the brandy out of mine though, to make them a little more child friendly).

These are an ideal biscuit to serve with coffee after a dinner party -:


Passion Fruit Cream Biscuits (from “The Ultimate Collection – A Vegetarian Cookbook” by the Lions Club of Menengai, Nakuru, Kenya)

For the biscuits :
125 gm Butter
40 gm Sugar
125 gm self-raising Flour
40 gm plain Flour
½ tsp Ginger powder
pinch of Salt
2 tbsp golden Syrup
1 tsp Lemon rind, grated
1 tbsp Lemon juice
2 Passion Fruit, pulp only
2 tbsp glace Ginger, finely chopped (I omit this as we can’t get it here easily)

For the Passion Fruit cream :
60 gm Butter
90 gm Icing Sugar
1 Passion Fruit, pulp only
2 tsp Brandy (optional)
Extra Icing Sugar for dusting

Biscuits - Cream the butter & the sugar together until light & creamy. Then add the flours, ginger powder, salt, syrup, lemon rind & juice, passion fruit pulp and glace ginger (if using). Knead everything together to make a soft dough. Refrigerate for 30 minutes & then roll out on a floured surface to around 6mm thickness. Cut rounds out of the dough with a 3,5 cm pastry cutter. Place biscuits on greased baking trays & bake at 200’C/400’F/Gas Mark 6 until light brown (around 12 to 15 minutes). Remove from oven & cool on wire racks.

Passion Fruit Cream (Filling) - Blend the butter, icing sugar, passion fruit pulp & brandy (if using) together until smooth & creamy and once the biscuits are cool, sandwich 2 together with the passion fruit cream, and dust the tops with a little icing sugar.

Monday, December 29, 2008

Christmas Shortbread

Melt-in-the-mouth, buttery Christmas shortbread ..... mmmmm !

I love shortbread – along with rusks, it is my ultimate baked treat and I can have neither around the house when I am dieting as my willpower goes out the window when either of these 2 delicious treats are around !

Of course, as it is Christmastime now (well .... just past Christmastime, I should say !), all those inhibitions go out the window as I bake (and eat) shortbread with abandon …. mmmmmm ! My Christmas biscuit tin is always filled with shortbread to enjoy with a nice cuppa afternoon tea …

This is a delicious, buttery yet crisp shortbread which melts in the mouth and screams “Have another piece !” at you. I make it every year, and it works beautifully every time -:


Christmas Shortbread (from the book “Favourite Christmas Treats” by Confident Cooking)

2 cups plain Flour
2 tbsp Rice Flour (or you can use Cornflour/Cornstarch)
1/3 cup Caster Sugar (very fine Sugar) – plus extra for dusting
250 gm salted Butter, cut into cubes

Sift dry ingredients together in a bowl. Add butter. Rub in using fingertips. Press mixture together. Turn out onto a lightly floured surface & knead gently. Press dough (about 1 cm thick) into a greased square baking pan, prick with a fork all over & bake at 160’C/365’F/Gas Mark 3 for 30 to 35 minutes until golden. Dust with caster sugar as it comes out of the oven & then allow to stand for 10 minutes before cutting it into squares & removing from the pan to cool on a wire rack. Keeps for up to 2 weeks in an airtight container.