Well, considering that I made this birthday cake for my daughter when she turned 4 in December last year, it’s taken me quite a while to get around to posting it, hey ?!
As I will probably bake her (and hersister brother !) 2 cakes each year (one for school and one for her birthday party at home) I’m sure that I’ll slowly work my way through all the numbers, so here is the first number cake I ever made, a number 4.
The cake (batter) recipe is my own, but the method of assembling the cake comes from the popular book “The Australian Women’s Weekly - Kid’s Birthday Cakes” which I bought on Amazon last year. I do love Australian recipe books because their ingredients are quite similar to the ones we can get here in Africa, and their recipes also seem to be geared towards our hot climate.
Here is how you make it -:
Basic (Plain) Cake Batter
200 gm Margarine (or Butter)
As I will probably bake her (and her
The cake (batter) recipe is my own, but the method of assembling the cake comes from the popular book “The Australian Women’s Weekly - Kid’s Birthday Cakes” which I bought on Amazon last year. I do love Australian recipe books because their ingredients are quite similar to the ones we can get here in Africa, and their recipes also seem to be geared towards our hot climate.
Here is how you make it -:
Basic (Plain) Cake Batter
200 gm Margarine (or Butter)
1 1/2 cups Sugar
5 Eggs
5 Eggs
3 cups Flour
4 tsps Baking Powder
2 cups Milk
Cream the margarine & sugar together. Add the eggs, beating well. Add the sifted flour and baking powder, then the milk. Beat all together until well mixed & pour into a greased 20 cm x 30 cm square cake tin. Bake at 190’C/375’F/Gas Mark 5 for 30 to 40 minutes until a knife inserted in the centre of the cake comes out clean. Allow to cool before removing from the tin.
How To Assemble The Cake: (taken from “Kid’s Birthday Cakes” by The Australian Women’s Weekly)
Using a serrated knife, level the cake top.
Place the cake cut-side down. Cut it into 3 even strips (of approximately 6,5 cm each) as shown below (I’ve used paper to illustrate this as I forgot to photograph this step with the actual cake) -:
 Leave the centre strip whole, & cut the remaining strips into 3 segments each, as shown below -:
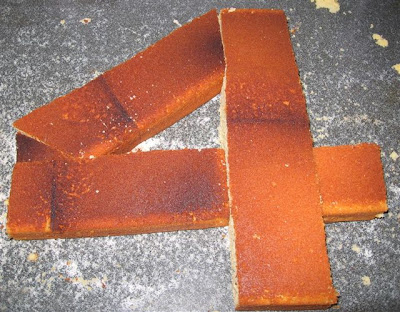
 Now assemble the cake pieces, as shown below, to form a number 4 (discard the off cuts). During both my trial run & the time I made the actual cake, I had to trim the one section (middle section far left pictured in the photo above) slightly so that it fitted properly, but you can only do this once you’ve laid the no 4 out & can see for yourself exactly where it needs to be adjusted -:
 This is what it looked like when assembled with the actual sponge, before icing -:
 Now you can ice the cake any way you like. I used a simple icing made by mixing icing sugar & water together, which I coloured pale lilac with food colouring powder (my daughter’s colour scheme for the party was pink and lilac) & I then covered the cake with flowers made from cutting pink and white marshmallows into slices (with scissors dusted in icing sugar) and pinching the ends to form ‘petals’. I used purple coloured sweets (candy) to make the flower centres, & dusted the spaces with glittery lilac sugar (which my Mum brought for me from South Africa – thanks, Mum !)
.JPG)